|
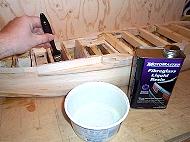
Coating the Hull Interior
Having completed the basic hull shape in Part I, the entire inside was coated in a thick layer of liquid fiberglass resin to help it keep its shape. I almost gassed myself with the fumes and would recommend doing this outside! |
Click Once To Enlarge |
| |
|
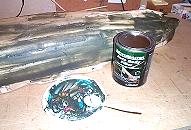
The First Coat of Filler
I was hoping to avoid using auto body filler to the hull, but after the drastic surgery to get the hull into the correct shape in Part I (thanks to the terribly inaccurate VTH plans), I had no choice. |
Click Once To Enlarge |
| |
|
I used short-strand auto body filler and applied it to everywhere where I could feel an imperfection in the surface. It's not a pretty sight when its on. This product also gives off a pungent and harmful vapour and must be applied in a well-ventilated area. | | |
|
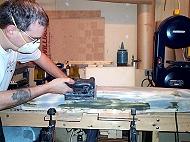
Rough Sanding
The auto body filler was then sanded with 100-grade sandpaper on an electric sander. It's important to wear a mask to prevent the inhalation of glass fibers from the auto body filler. |
Click Once To Enlarge |
| |
|
The lighter colored areas are the ones that have been already sanded. Once sanded, the surface was checked for smoothness and then the process was repeated. I repeated this process 7 times to get it right | | |
|
|
| Back to the Pommern Index Page |
|
|
