|
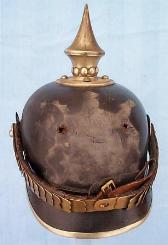
The first step is to examine the helmet for integrity to ensure that it is not too fragile for cleaning. In this example, the helmet appeared to be solid and in very good shape. Having confirmed that the helmet will take the stresses of cleaning, the next step is to remove only those fittings that are easily removable. This includes any parts that are held on with nuts, bolts, screws, or leather wedges. Do not remove parts that require you to bend metal prongs. The stress of bending metal which has remained dormant for 90 years or more will almost certainly result in one or more breaking. Quite often, only carefully removing the front helmet plate for cleaning will suffice.
| | |